Want one link for everything? 😎 Learn how to create a Linqin.in account, choose your username, verify your account and build your creator page step by step.
How to Create a Linqin.in Account: Step-by-Step Guide for Beginners
Create your free creator page, claim your username and start sharing links, products and services from one place.

If you are a creator, freelancer, coach, educator, small business owner or someone building an online side income, having one simple page for your important links can save a lot of time. Instead of sending people to different profiles, product pages and contact options, you can bring those destinations together in one shareable page.
Linqin.in is built around this idea. Its current signup page offers a free account, a custom username, email signup, Google, Facebook and WhatsApp options, with no credit card required for the free plan. The signup page also lets you verify your email with a six-digit code or use WhatsApp OTP. citeturn1view0turn0search1
What You Can Do After Creating a Linqin Account
Once your account is ready, you can build a public page such as linqin.in/yourname, add important links, showcase products, connect social profiles and use the platform's creator-focused features. The current Linqin homepage also highlights digital products, lead capture, analytics, payments and Instagram automation. citeturn0search1
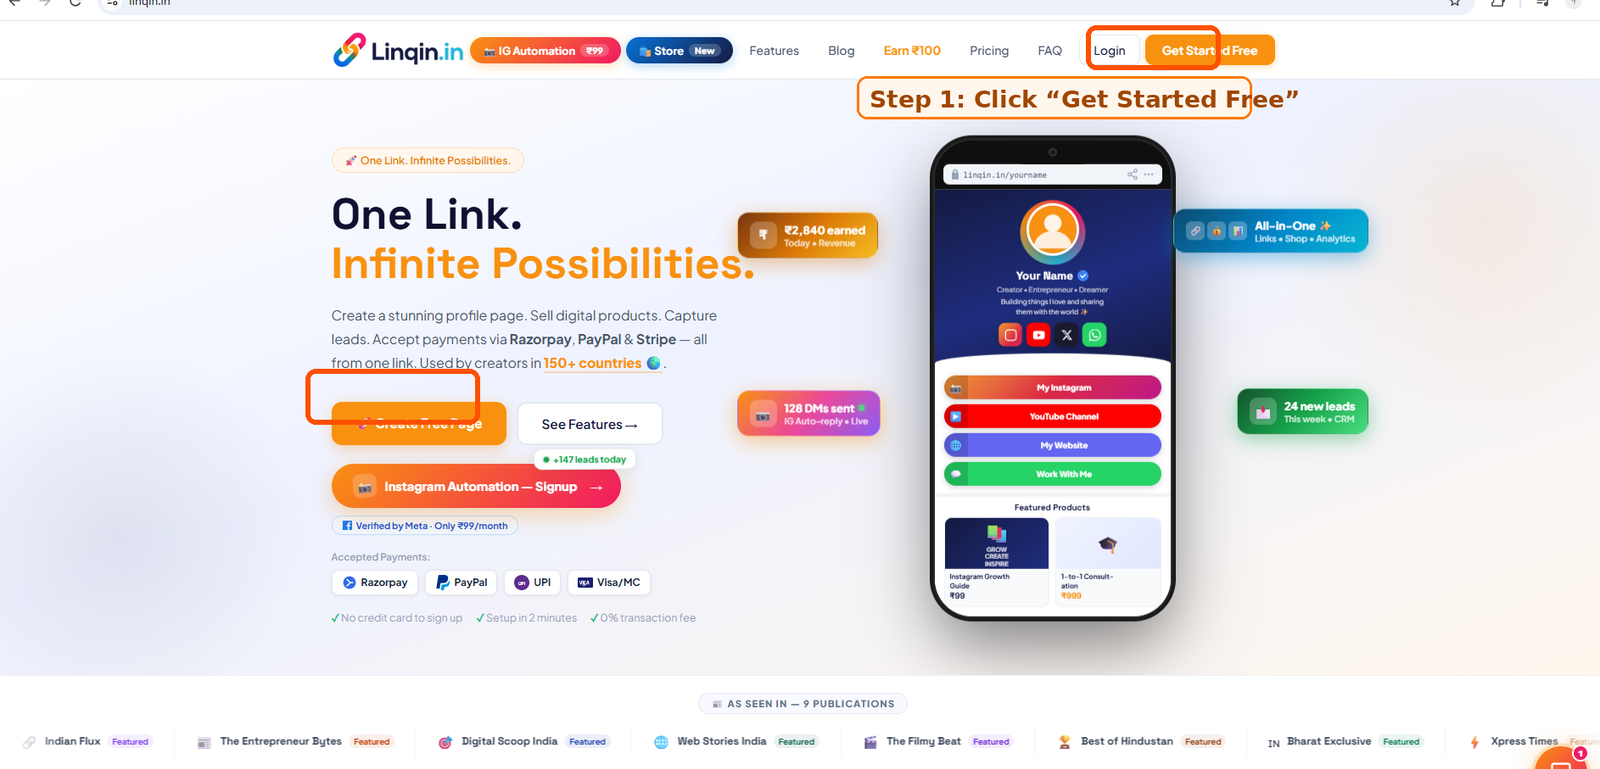
Step 1: Open Linqin.in
Open linqin.in in your browser. On the homepage, look for the Get Started Free or Create Free Page option. Click it to begin the signup process.

Step 2: Choose How You Want to Sign Up
The current Linqin signup page gives you several ways to begin. You can continue with Google, Facebook or WhatsApp, or choose the email signup form. citeturn1view0
For a straightforward account setup, email signup is a good option because your account remains connected to an email address that you can use for verification and future login.
Information Required for Email Signup
- Full Name — enter the name you want associated with your account.
- Username — choose the name you want in your Linqin URL.
- Email Address — use an email address you can access.
- Mobile Number — optional on the current form.
- Password — use a strong password with at least eight characters.
- Confirm Password — enter the same password again.
- Coupon / Referral Code — optional if you have one.
These fields and the current minimum password requirement are shown on Linqin's live signup page. citeturn1view0

Step 3: Pick Your Username Carefully
Your username matters because it becomes part of your public Linqin page address. The signup page shows the format as linqin.in/yourname. citeturn1view0
Choose something that is easy to remember and matches your creator name, business name or personal brand. Avoid random numbers unless they are genuinely part of your brand.
For example, a creator called Priya Sharma might prefer a clean username such as priyasharma if it is available.
Step 4: Verify Your Email
After submitting the email signup form, Linqin's current signup flow displays a verification step. A six-digit code is sent to your email address. Enter the code in the verification fields and choose Verify & Create Account. citeturn1view0
If the code does not arrive, check your spam or promotions folder first. The page also provides a resend option and a way to change the signup details. citeturn1view0
Step 5: WhatsApp Signup Is Also Available
If you prefer WhatsApp verification, the current signup flow allows you to enter your mobile number and receive an OTP through WhatsApp. After verification, the page asks for your name and email before completing the account. citeturn1view0
This can be useful for users who prefer phone-based verification instead of email verification.
Step 6: Complete Your Creator Profile
Once the account is created, move into your dashboard and start with the basics. Add your profile name, profile photo, short bio and the links that matter most to your audience.
Do not add twenty unrelated links on day one. Start with the destinations your audience actually needs, such as Instagram, YouTube, WhatsApp, website, portfolio, booking page or your main product.
Step 7: Add Your First Product or Offer
If you sell digital products, Linqin can also be used as a central destination for products and payments. The platform currently highlights eBooks, courses, templates and consultations as examples of products or offers creators can sell. citeturn0search1
Start with one clear offer rather than filling your page with everything you have created. A focused page usually makes it easier for visitors to understand what they should click next.
Step 8: Share Your Linqin Link
After your page is ready, add the Linqin URL to your Instagram bio, YouTube profile, LinkedIn profile, Pinterest profile or other places where your audience already finds you.
The idea is simple: instead of constantly changing your social-media bio whenever you launch something new, keep one central Linqin page and update the destinations inside it.
Quick Linqin Setup Checklist
Final Thoughts
Creating a Linqin.in account is a relatively simple first step toward building a more organized online presence. The important part is what you do after signup: choose a clear username, create a useful profile, add only your most valuable destinations and give visitors an obvious next action.
Start small. You do not need a perfect page on day one. Once your basic profile is live, you can improve the design, add products, connect more channels and experiment with different ways of turning visitors into followers, leads or customers.
Ready to create your page?
Start with Linqin's free signup and claim your unique creator URL.
